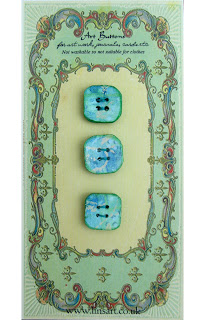
How to make your own Art Buttons
Materials Used
Buttons - Use recycled buttons such as shirt buttons or new buttons such as the spares that come with new clothing [and are usually never used]. These should have one flat side but in any colour you wish. It doesn't really matter if the buttons are upside down on an art project.
Matte Gel Medium (glue) [I used Liquitex] or Mod Podge [I used outdoor]
Acrylic Wax [I used Colourcraft] This is a brush on wax with the appearance of varnish or you could use varnish or glaze.
Art Work - your own art work, found papers but basically any paper which is thinnish, like printer/copy paper. If you are using your own art work also use thin or printer paper with washes of colour such as watercolours, inks, dyes, brush pens, pencils, thin acrylics etc but avoid paints that are very thick.
Emery board [sandpaper]
Isolator/Viewing Card [useful but not essential] If you have a large piece of art and want an idea of what a finished button would look like, make an 'isolator'. Draw around the button[s] you will be using onto a scrap piece of card or paper and then cut the hole out. Then you can place the card with the hole over your work to find a section that will look good. Remember there will be button holes in it when finished too, so bear these in mind when placing the artwork on the button.
Cutting Mat
Bradawl
Scissors/Craft Knife
Version 1
Brush matt gel medium on the flat side of the button and also on to the piece of art work on the wrong side. You don't have to cut out the button shape in the art work at this stage, just a small square will do which is slightly bigger than the button. Place the art on top of the button and smooth down firmly, then apply more glue over the button.
Allow to dry completely.
Place button on a cutting mat and trim when dry by scoring around the button with a bradawl. I find it works best if the bradawl is dipped in water first, just to dampen it, but not soaking. Tear off the excess paper. Use an emery board to smooth any loose bits of paper. Use the bradawl on a cutting mat to poke through the holes, both sides.
Use an ink pad to colour the edges before waxing, it will cover any white bits and the sanded areas.
Apply a top coat or two of acrylic wax to the surface.
Version 2
You could also use clear buttons which are flat underneath so that the pattern shows through the button. Samples below - clear buttons were used on the first six images. This time the paper will be under the button so the glue is applied to the right side of the paper instead of the wrong side. Trim and finish like Version 1.
Version 3
These are a little trickier and they are made with black and white laser prints. Use buttons that are pale as the ink will not show up on dark buttons. Glue the right side of the art work and the flat side of the button and press together firmly. Now you can either wait a few seconds and remove the paper which should leave the ink and a thin layer of paper or allow it to dry completely. Both methods work, but I have had more success with the latter. Trim as version 1. Lightly dampen the paper all over the button with your finger and gently rub off with a thumb. The paper should come off but leave the toner ink on the button. If you rub too hard the ink will come off too, so be gentle. It may be necessary to repeat the process if all the paper does not come off at once. Apply a top coat or two of acrylic wax to the surface. If you like perfection then this version is probably not for you as some of the ink does come off.
Tips
Lightly domed buttons will work, but not ridged, but try flat ones on a first attempt.
Some ink jet prints may smudge a little when applying glue but they usually turn out ok.
Found papers could include diary pages, maps, book pages, music, monopoly money, postage
stamps, magazines, painted laser prints, bills, till receipts, thin tickets
If you have art work that you would like to use but it is thick, then scan or photograph it and print it out on a printer
As featured in Cloth Paper Scissors


Thanks so much for the tutorial. Im going to try some of these today!
ReplyDeleteYou're welcome. Let me know how you get on.
DeleteThank you - this sounds great! When holidays are on I hope I can try it (as in get all I need here. Germany is a little behind, Spraying oil came in late and you still cannot buy self-raising flour! Reckon I will have to ask Mr amazon...).
ReplyDeleteOh, and start keeping those buttons you never need, of course!